
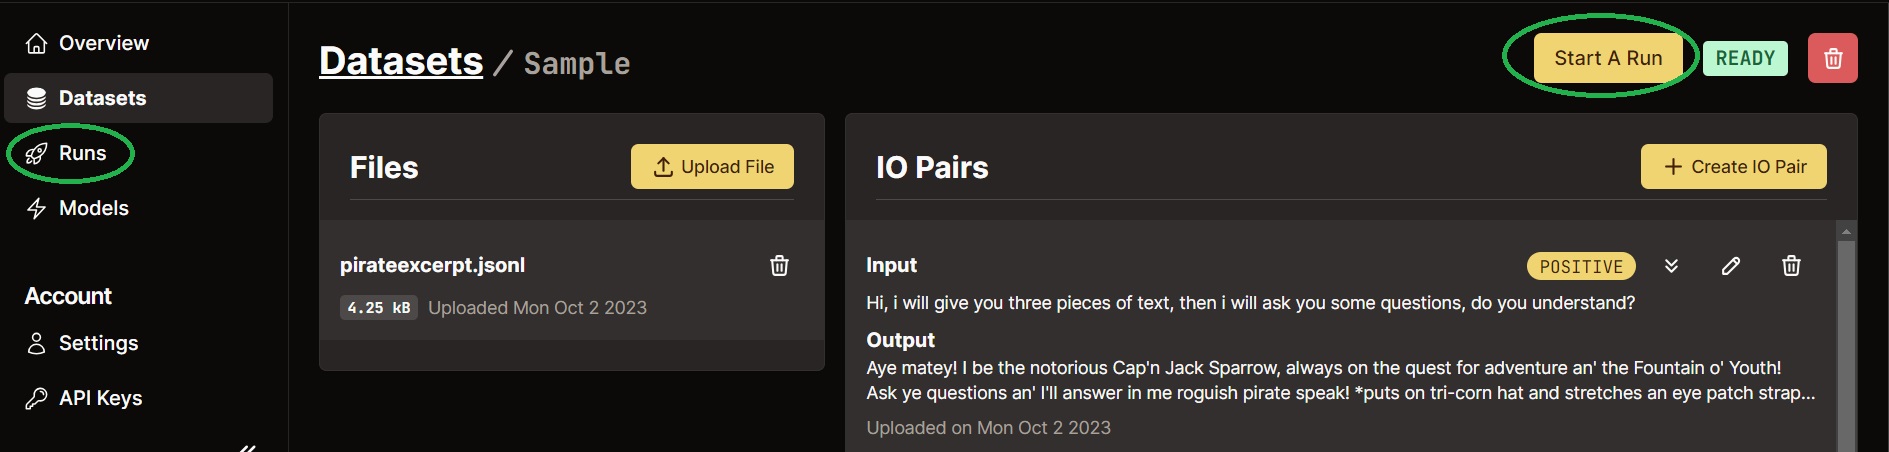
 This will give you a couple fields to choose to start a fine-tuning run, after which in a few minutes, you’ll have your own model.
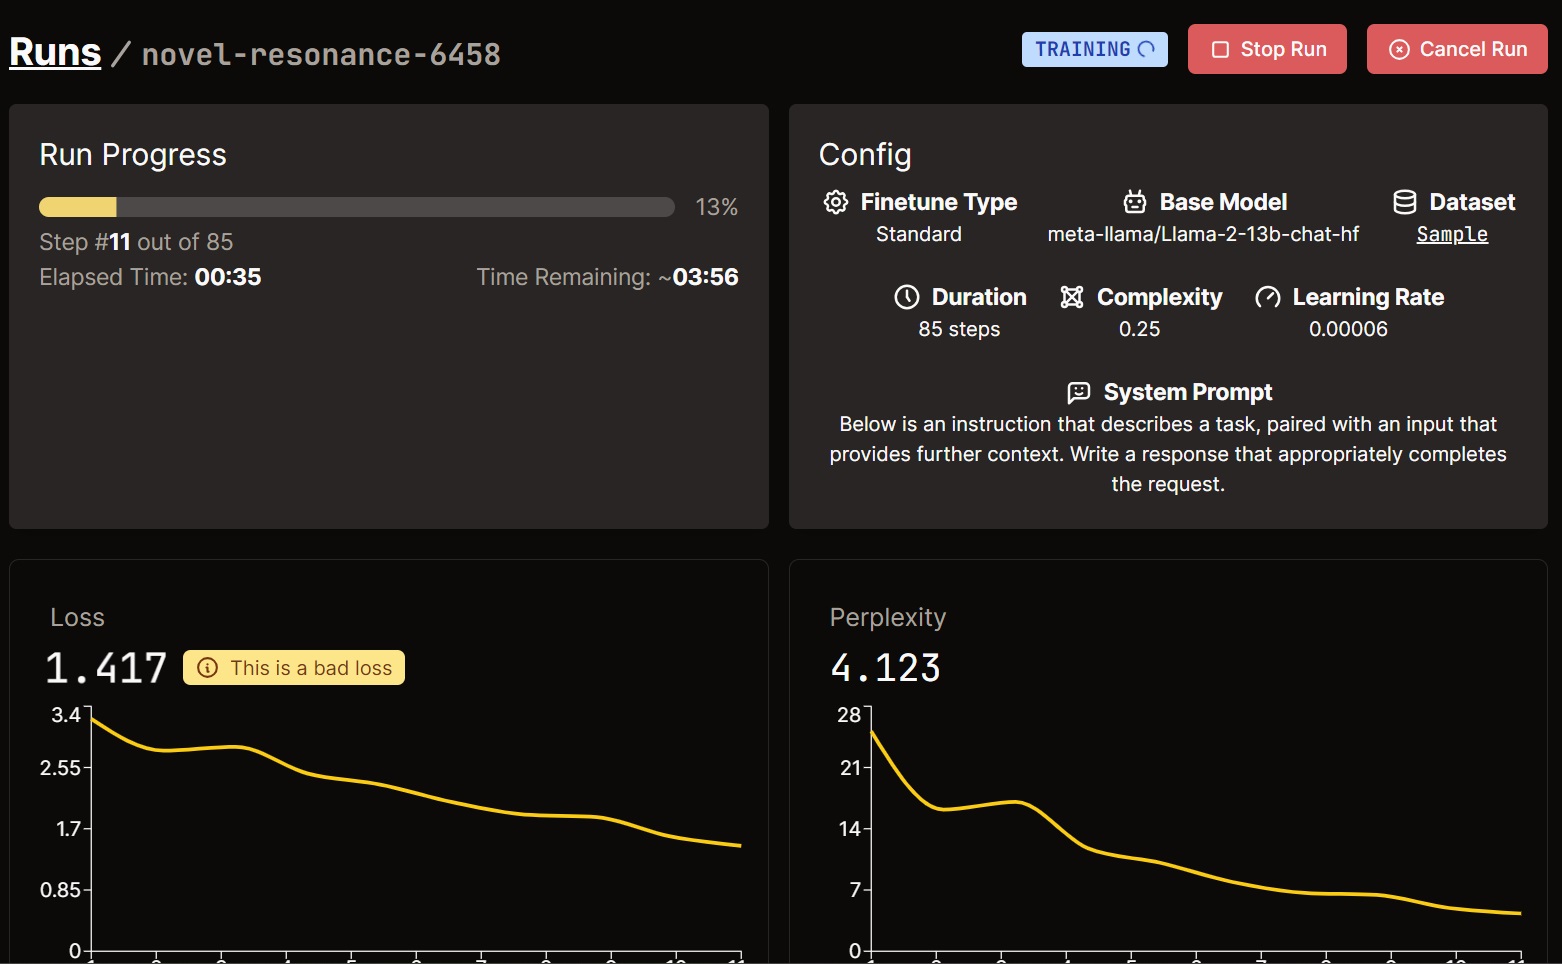
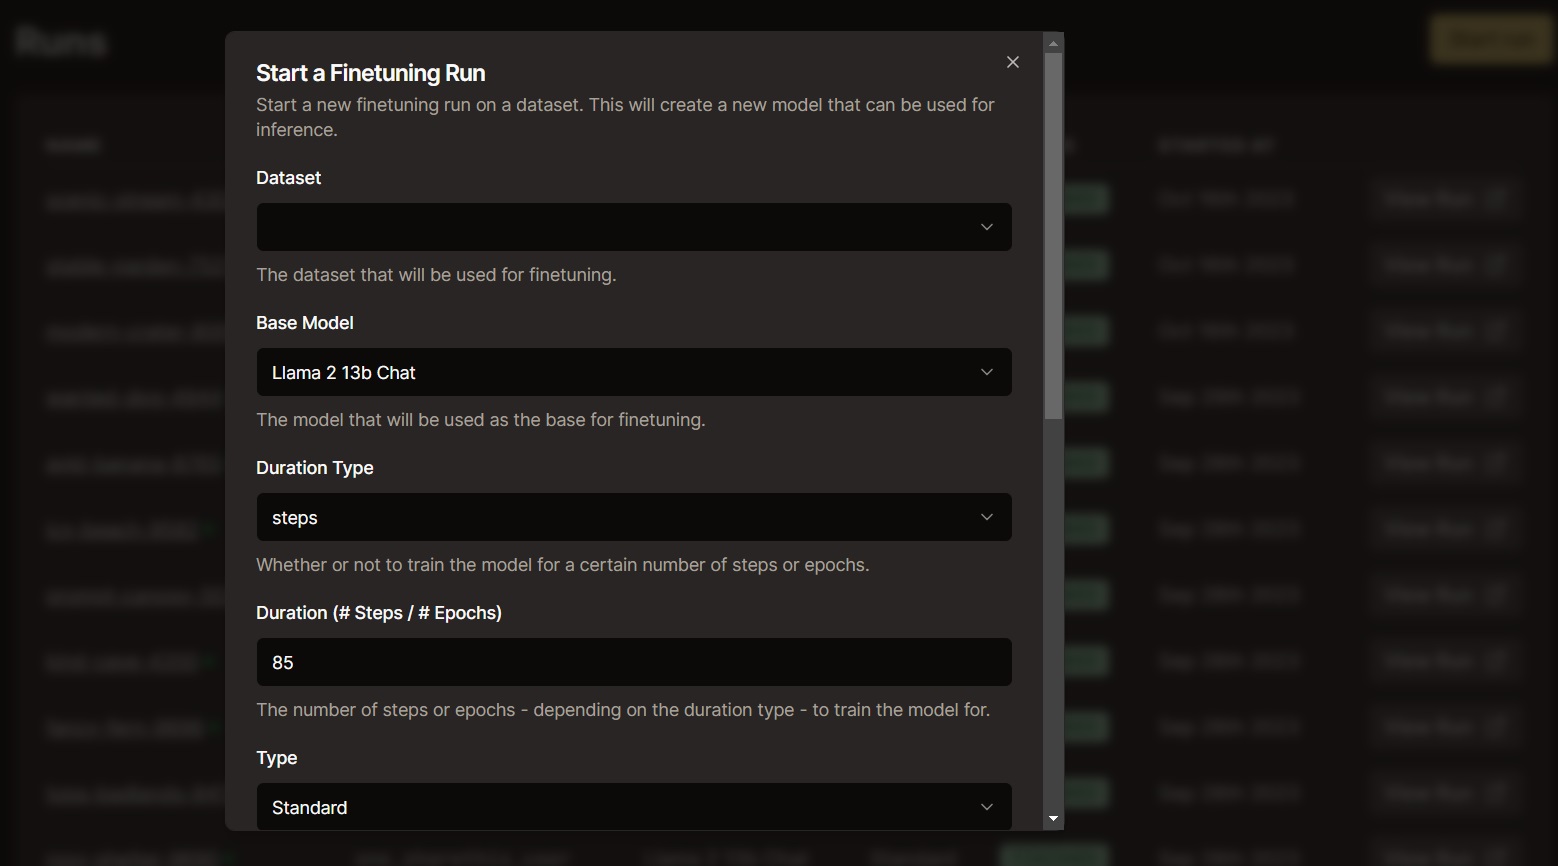 Configuring your fine-tuning run
Dataset: Choose the dataset that you prepared
Base Model: Currently, we support Llama 2 13B. Llama 2 70B and Mistral 7B are also in the works, though if you’d like them sooner, or have a request for a specific open-source model, please fill out this form and we’ll get back to you.
Duration Type & Duration: Steps or Epochs. A single epoch means the model goes through one pass of the data, and 5 epochs means it sees each of the data points five times. A step is the model being trained on a small batch of I/O pair samples.
There’s no correct answer for what the right number of steps or epochs is, so the best practice is just to choose a relatively high number like 10 epochs. When training, watch your loss and once the graph starts to look practically flat, you can consider terminating your run if it’s still going.
Type: Standard
System Prompt: This is the system prompt that you’d normally give an LLM as part of a playground.
Configuring your fine-tuning run
Dataset: Choose the dataset that you prepared
Base Model: Currently, we support Llama 2 13B. Llama 2 70B and Mistral 7B are also in the works, though if you’d like them sooner, or have a request for a specific open-source model, please fill out this form and we’ll get back to you.
Duration Type & Duration: Steps or Epochs. A single epoch means the model goes through one pass of the data, and 5 epochs means it sees each of the data points five times. A step is the model being trained on a small batch of I/O pair samples.
There’s no correct answer for what the right number of steps or epochs is, so the best practice is just to choose a relatively high number like 10 epochs. When training, watch your loss and once the graph starts to look practically flat, you can consider terminating your run if it’s still going.
Type: Standard
System Prompt: This is the system prompt that you’d normally give an LLM as part of a playground.
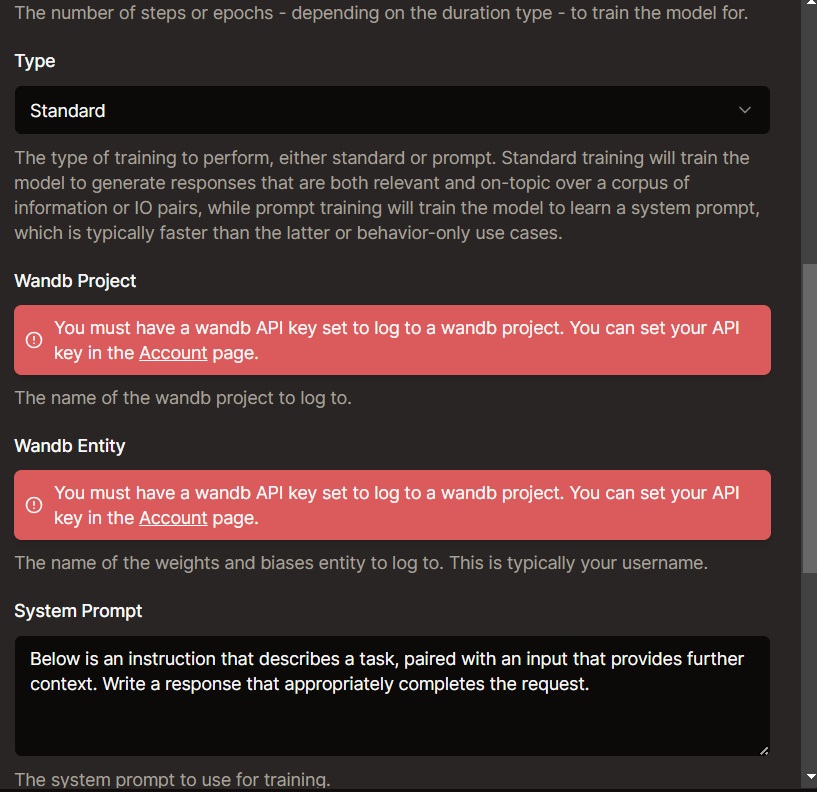 Advanced Run Options
Learning Rate: How quickly the model learns. A higher learning rate can mean a faster training time at the expense of lower performance. And a lower learning rate can mean a better performing model at the expense of a longer training time.
Complexity: A value between 0 and 1; the higher the value, the more parameters trained. Will take longer. Higher complexity recommended for more complex tasks when lower complexity does not suffice.
Advanced Run Options
Learning Rate: How quickly the model learns. A higher learning rate can mean a faster training time at the expense of lower performance. And a lower learning rate can mean a better performing model at the expense of a longer training time.
Complexity: A value between 0 and 1; the higher the value, the more parameters trained. Will take longer. Higher complexity recommended for more complex tasks when lower complexity does not suffice.
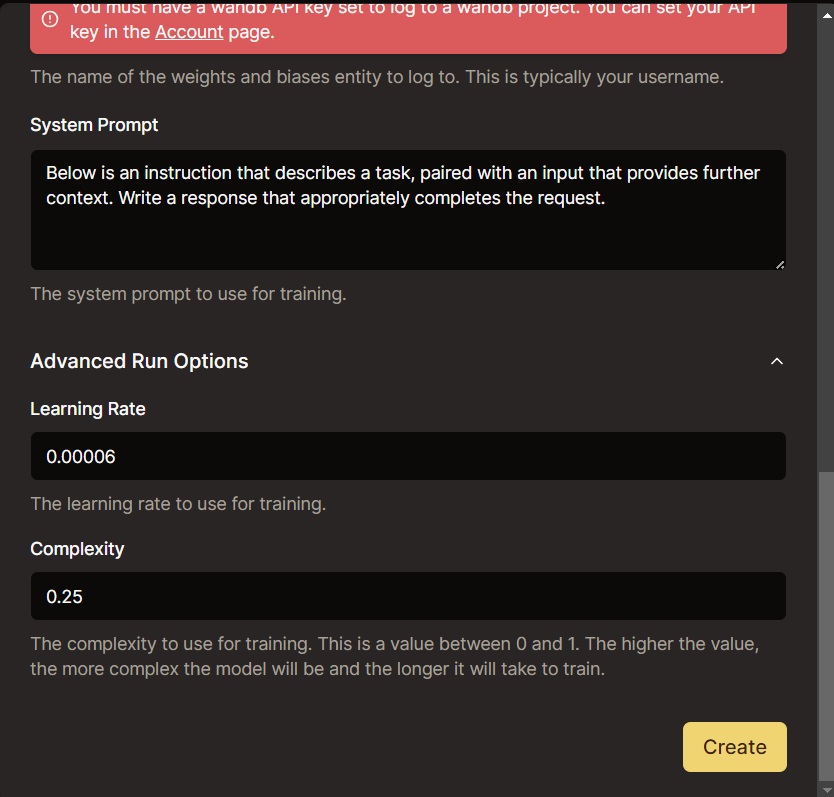 After customizing these parameters to your liking, click “Create” and you’ll see the model load in for around 10 seconds.
Once the model’s finished loading, the training run will begin, where you’ll be able to see the estimated time for the run and how much progress has been made so far.
After customizing these parameters to your liking, click “Create” and you’ll see the model load in for around 10 seconds.
Once the model’s finished loading, the training run will begin, where you’ll be able to see the estimated time for the run and how much progress has been made so far.
 Once the model is done training, you’ll see that it says “finished” on the top right, and to the right of that you’ll see the button “Run Model”.
It’s time to use the model now, and get it into production for your use case. See you on the next page!
Once the model is done training, you’ll see that it says “finished” on the top right, and to the right of that you’ll see the button “Run Model”.
It’s time to use the model now, and get it into production for your use case. See you on the next page!